
A storage unit can provide you with extra space for stashing excess furniture, collections you’re not ready to part with, or even small-business inventory.
As handy as it is to have, if it isn’t organized properly, it will just cause you grief. Avoid that headache by taking the time to establish a system.
This guide will walk you through an easy process of getting that storage space ship shape!
1. Decide what goes in
Think about the items you want to store in your unit. The placement of possessions within the storage unit might just be the most important part of the organization. There may be things you’ll want to retrieve on a regular or seasonal basis, that will need to be more accessible than long-term storage items.
For example, the holiday decorations that you will want every year should be placed closer to the front of your unit compared to something like the old door frames your saving for a future project.
- Pack in the front: items you’ll want quick and easy access to
- Pack in the back: items that you expect to keep in long term storage – especially heavy things.
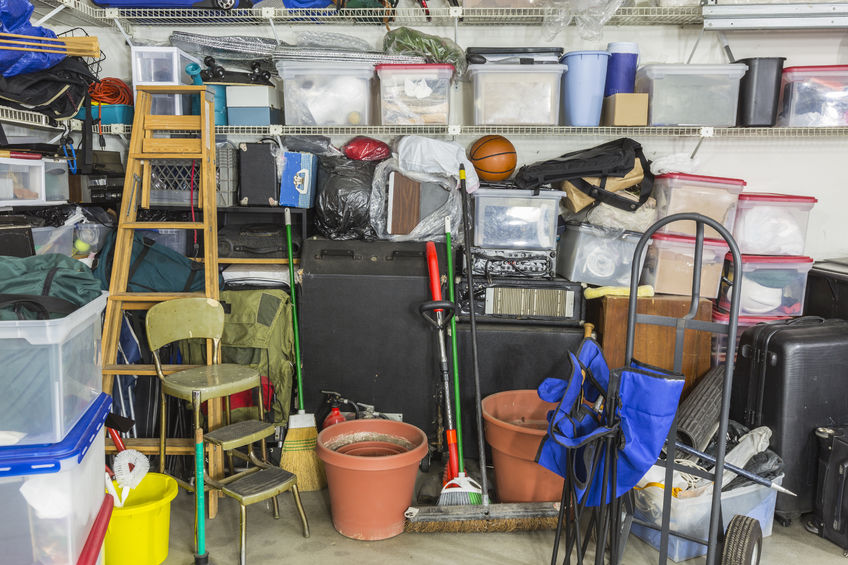
You don’t have to stack boxes on the ground or each other, you can get extra organized with stand up garage shelving and sturdy tubs. Maybe even a hanging rack for fancy clothes or quilts.
Once you have an idea of the items going into storage and make a general plan for placement, you’re ready for the next step.
2. Pack and Label
Choose boxes of similar sizes for compact packing and stacking. Book boxes are a great size that is easy to lift, even if you load it with heavy items. You might not be able to fit everything in book boxes, but they can certainly fit a lot.
Village Green Storage will have a variety of boxes for you to choose from. Stick to this general rule set when packing your boxes:
- Small boxes: heavy items like books, papers, dishware
- Large boxes: light items like clothing, blankets, decorations

Consider using plastic tubs if they’re in your budget. They’re heavy-duty and water-resistant. Garment bags can help organize special blankets or clothing on a hanging rack. Odd shaped items, like a fragile globe or guitar, should be packed and padded with care.
Keep like items together (aka don’t pack your extra cooking pots with your beach toys). Though it might seem like extra work to organize as you go, your future self will surely thank you.
Most importantly, label your boxes!! And label them well. It’s easy to think you can remember what you packed and even easier to forget it all. A simple marker and masking tape will do just fine.
An example of good labeling:
- “Holiday decorations: tinsel and tree ornaments”
- “Old clothing for kids 2T-4T”
- “Books: fiction novels A-H”
3. Keep track of it
While you’re still working on labeling and packing, start keeping track of everything in a master list. Digital or paper, a list of everything you packed will come in handy in the future when you are looking for something that you aren’t sure if you packed away.
Think about organizing your master list into sections:
- Front/Middle/Back of unit: right or left
- Quadrants
- Front or Back / Right or Left
You can go about it anyway, just find a system that makes sense to you and works for your belongings. Under each section, annotate the label you used for each box and if you want to get detailed, include a general or specific description of the box contents.
4. Load it up
You’ve got a plan, you’ve got everything packed and labeled – now for the grunt work. Stick to the load plan that you crafted, but make adjustments when necessary. Just be sure you mark changes on your plan reference so it stays accurate.

If you’re handy with a sketch, try making a map of your pack plan. You can keep a copy in your home documents and stash one inside your storage unit too.
Store with smarts:
There are some basic rules when packing boxes and items together. Follow these guidelines to keep your belongings secure and your boxes easy to manage:
- Heavy boxes at the bottom: don’t go stacking a box of chunky textbooks on top of your box of vintage scarves. That won’t end well.
- Watch the height: if those box towers start creeping above your head, be aware of how sturdy the stack is. You don’t want to risk any toppling, which could be unsafe for you and your fragile belongings.
Troubleshooting:
Say you have a bunch of pre-packed boxes from your past-self before you decided to get organized. Go ahead and unpack them to take note of what you’ve got. Repack it into a more organized system.
Remember to keep like items together – Extra table settings pair well with a dining room table leaf and spare chairs. Summer pool toys play nice with your trampoline and badminton set.
If you’ve been through the steps and still feel overwhelmed, maybe you need more space? The fine folks at Village Green Storage can help you figure out what size storage unit will work best for you.
It can be quite the luxury to have a storage unit with shelves you can walk between instead of one that’s packed to the gills and requires a pro Tetris consultant to help you breakthrough. So, think about going bigger if you’re on the fence.
Conclusion
Having a well-organized storage unit is completely worth the time and effort. It’s something you only have to do once, and it will benefit you for ages.
It also makes sharing the load easier, like when you send your partner to pick up those books you’re looking for, the handy map and master list you made before will lead them straight to the right box.
So, get those boxes sorted when you load your unit and your future trips will be an easy task instead of something to dread!